

How to create a regular tetrahedron (Example A)


Try making a model of a regular tetrahedron with sides measuring 100 mm.
It's a simple shape, but there are several ways to do it, depending on how you create the sketch and the features you use.
I'll introduce some modeling examples later, so please think about it before you see the answer.
-
Step 1: Overview
This method involves sketching an equilateral triangle and extruding it to the height of its vertex to create a model. However, if you extrude it normally, you'll end up with a triangular prism, not a pyramid. To create a triangular pyramid, set the taper in the "Advanced Properties" menu.
First, create a sketch.
There are various ways to sketch an equilateral triangle.
-
Step 2: Create a sketch.
First, create a sketch.
There are various ways to sketch an equilateral triangle.
Sketch creation example:
Method 1 :
Roughly create a triangle, set the geometric constraint "horizontal" at the base, and set the dimensional constraint to 100 mm. Constraining the remaining two sides to "equal" to the base will result in an equilateral triangle.
However, in order to make the centroid of the triangle coincide with the origin, we need to add an auxiliary line. This is easy to understand, but it requires a bit more work.
Method 2 :
Use construction lines to draw a circle centered on the sketch origin. Use appropriate dimensions. Next, create a triangle in the same way as in method 1. Apply a "horizontal" geometric constraint to the base and a dimensional constraint of 100 mm. Constraining the remaining two sides to "equal" to the base will result in an equilateral triangle.
Next, constrain the circle and each side with "tangent." This will create an equilateral triangle with its centroid at the sketch origin. This method requires slightly less work than method 1.
Method 3 :
This method uses the polygon sketch command. Expand the rectangle ribbon menu to the bottom, and the "Polygon" menu will appear. You can draw an equilateral triangle by setting the number of angles to 3. A sketch point will be placed at the centroid, so align this point with the sketch origin. Set the base to "horizontal" to complete the triangle. This method requires the least amount of steps.
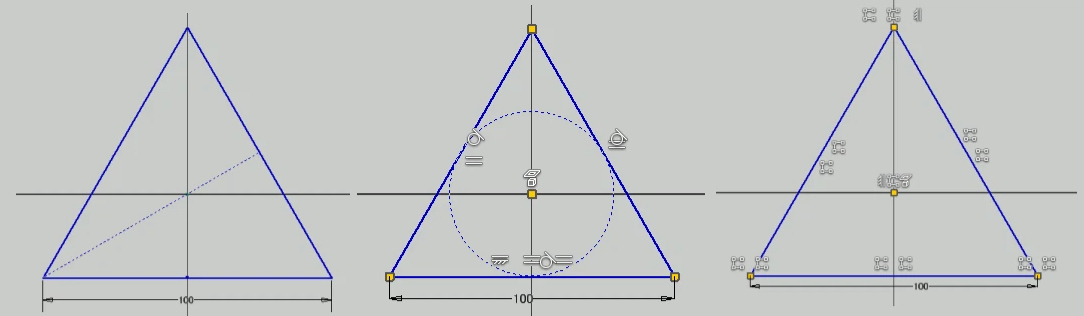
Sketch of an equilateral triangle
-
Step 3: How to Calculate the Height
How to Calculate the Height of a Triangular Pyramid (Tetrahedron)
To perform an extrusion in Inventor, you need to know the height from the base to the apex. Many users may struggle with how to determine this height.
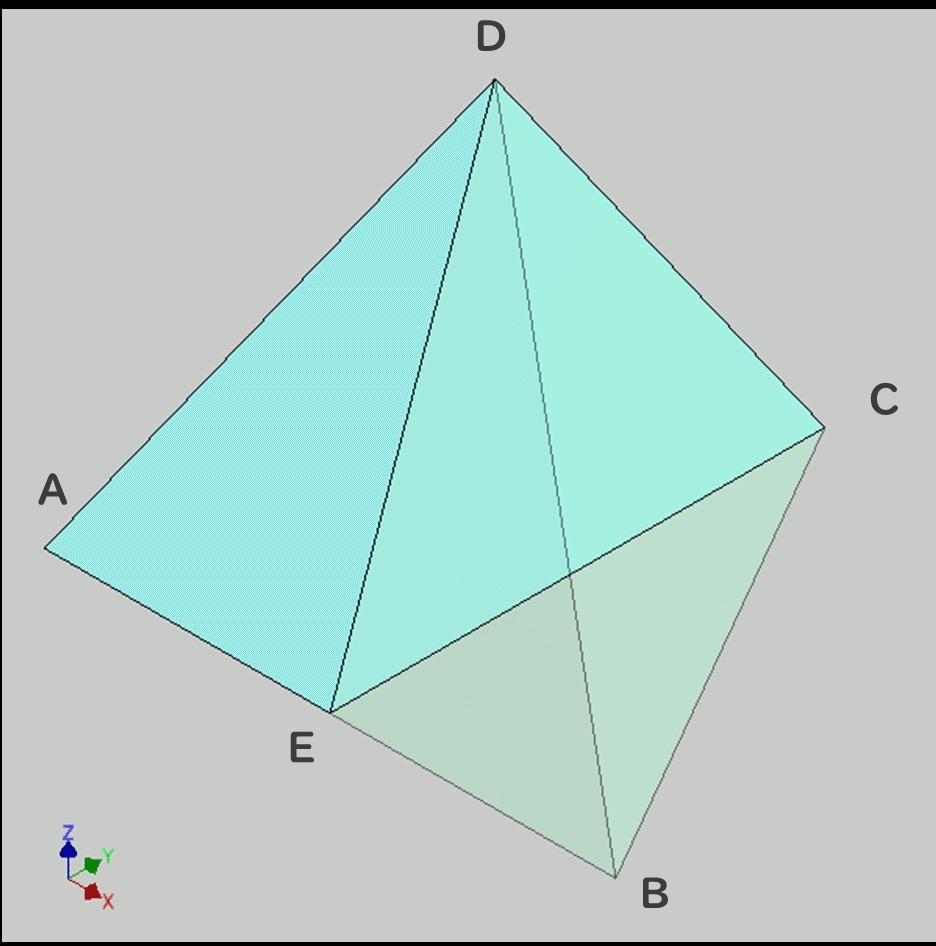
This diagram shows a regular tetrahedron sliced along a plane that passes through:
• Point E, the midpoint of base edge AB
• Point C, one of the base vertices
• Point D, the apex of the triangular pyramid
Since BD = BC, triangles EBD and EBC are congruent. Therefore, in triangle CDE, we have CE = DE.
Edge CD is one side of the regular triangle and measures 100mm.
Because CE lies on the cross-sectional plane, its true length is visible.
Once triangle CDE is defined, the position of point D—the apex of the tetrahedron—is determined.
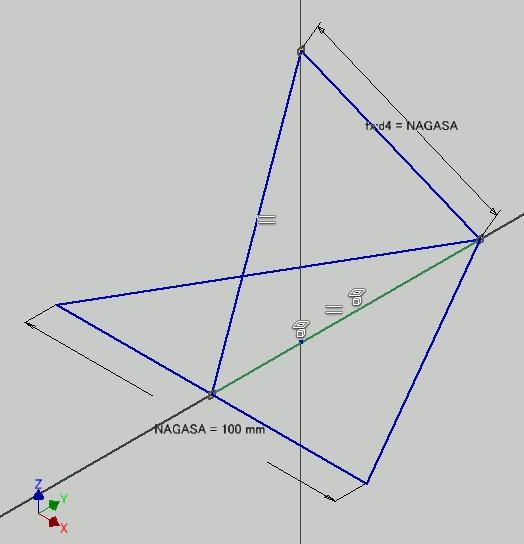
Sketch of a fully constrained triangle CDE
-
Step 4: Finalizing the Sketch
The sketch of triangle CDE is constructed as shown in the diagram, with all necessary reference dimensions added.
The diagram shows a fully constrained sketch of triangle CDE.
The regular triangle ABC lies on the XY plane, with its base parallel to the X-axis and its centroid aligned with the model origin. Therefore, the sketch of triangle CDE is placed on the YZ plane.
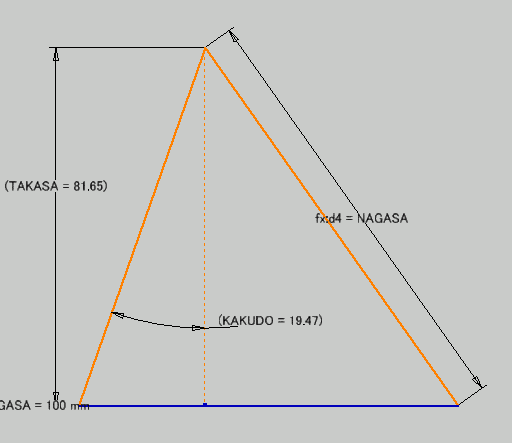
Parametrizing the Geometry
- The height to the apex is defined as a reference dimension as TAKASA and parameterized for later use.
- The taper angle during extrusion corresponds to the angle between line DE and the Z-axis. This angle is also parameterized as a reference dimension as KAKUDO.

Parameter
note: TAKASA is Height, KAKUDO is Angle in Japanese.
-
Step 5: Final Model
Extrude the base equilateral triangle up to the reference dimension TAKASA (height).
Apply an inward taper using the parameter KAKUDO (angle) in the extrusion feature.

The extrusion dialog box and the resulting model appear as shown in the diagram.
The completed model can be downloaded from https://grabcad.com/library/tetrahedron-a-1