

How to make an animation for a compression spring in Solidworks 2011?


Tutorial to make animation for a compression spring in solidworks.
-
Step 1:
1. Model a spring and make the centre line always visible as shown in the figure.

-
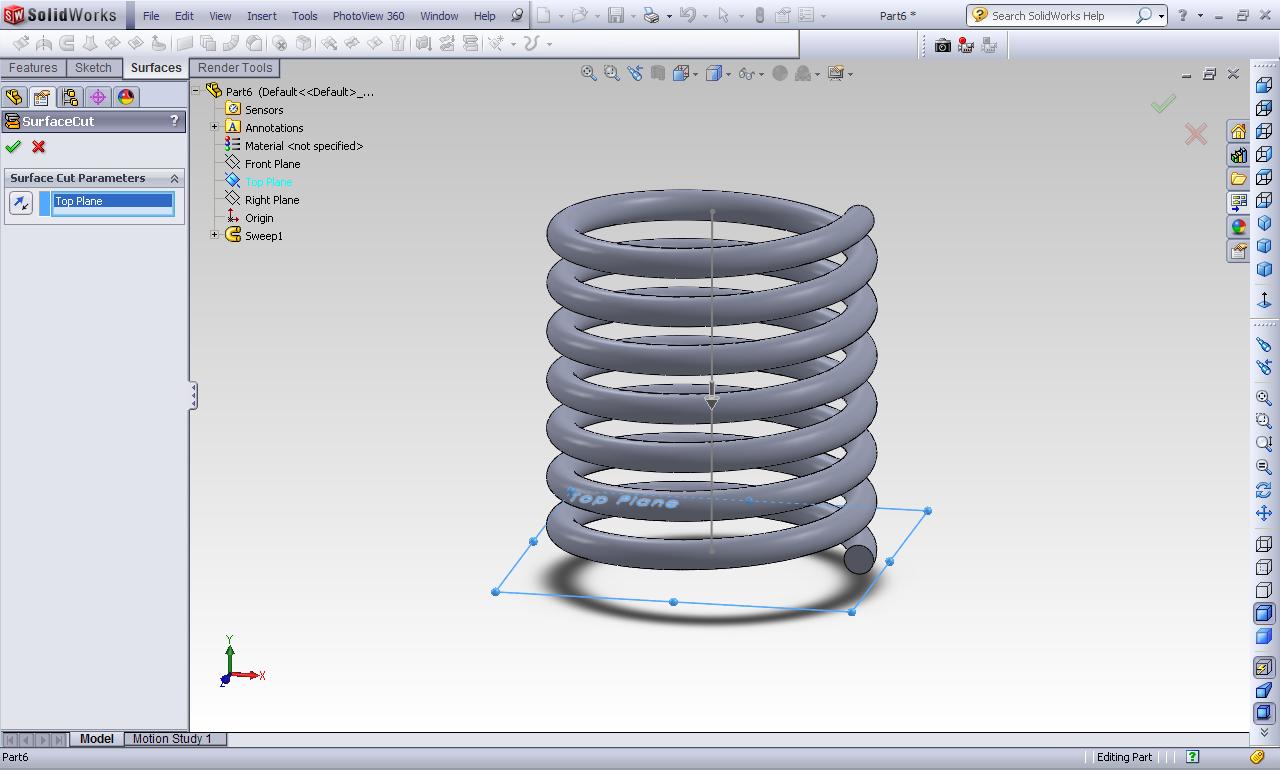
Step 2:
2. Make the bottom part of the spring surface flat with the process shown below. Use “surface cut” tool for this purpose.
-
Step 3:
3. Repeat the same process for the top portion.

-
Step 4:
4. Make a part similar to the figure shown below or of a simple shock absorber.

-
Step 5:
5. Make the bottom part of the spring coincident to the part created in the above step as shown.

-
Step 6:
6. Right click on the sketch shown in blue colour and edit it. Before editing the part you must save your assembly file.

-
Step 7:
7. Make the line and the part co-incident as shown in the figure.

-
Step 8:
8. Click on “motion study” at the bottom of the solidworks window.

-
Step 9:
9. Place the model as shown in the figure and drag the bar in the timeline represented by orange color to a certain time as per your requirement.

-
Step 10:
10. Drag the part out as shown in the figure. The bars in the timeline will automatically get generated.

-
Step 11:
11. Now drag the orange colored bar to a greater length on the timeline.

-
Step 12:
12. Click on “calculate” button as shown.

-
Step 13:
13. Save the animation.
